This guide explains how to configure the proxy connection details in Hubstudio.
Step 1: Prepare the proxy connection details
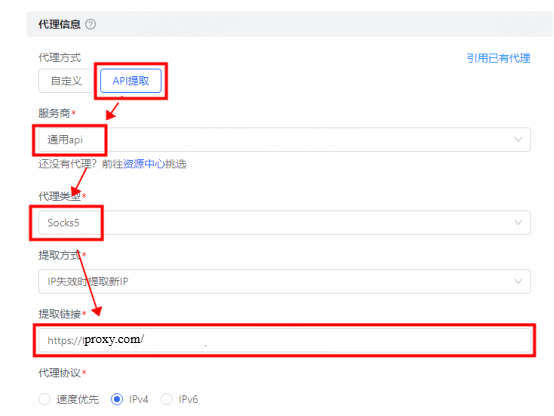
Open the product page in the SolisProxy user dashboard and obtain the connection details available for your current plan.
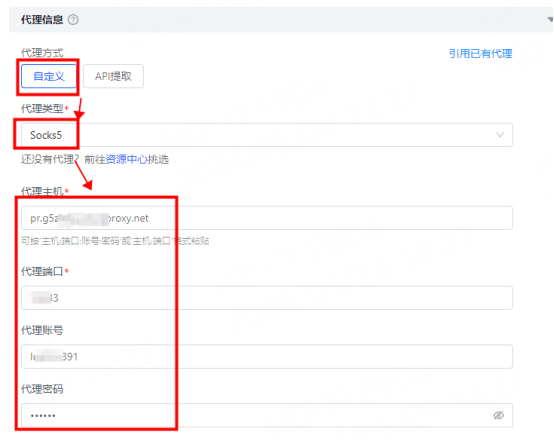
- Proxy host or gateway
- Proxy port
- The protocol shown in the dashboard
- If credentials are included, prepare the connection username and connection password
Use the generated proxy connection credentials. Do not enter your SolisProxy account login password.
Step 2: Configure the proxy
- Open the network, proxy, or connection settings.
- Choose the same proxy protocol as the SolisProxy output.
- Enter the proxy host and port.
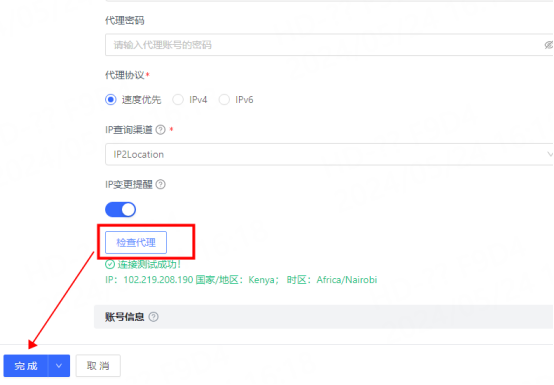
- If authentication is requested, enter the connection username and connection password.
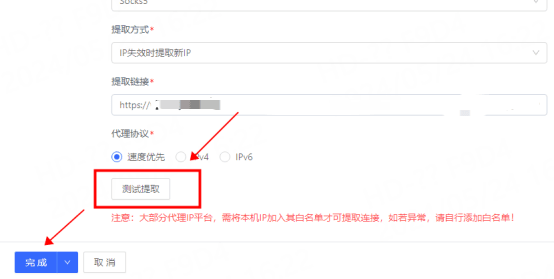
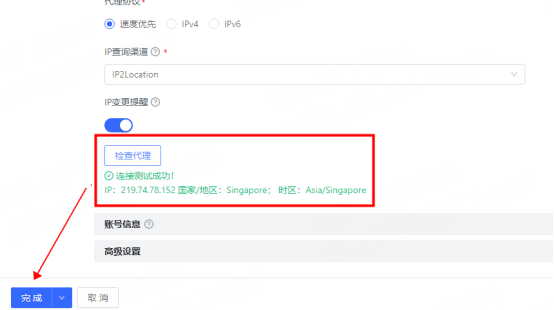
- Save the settings and restart the tool if required.
Original setup screenshots
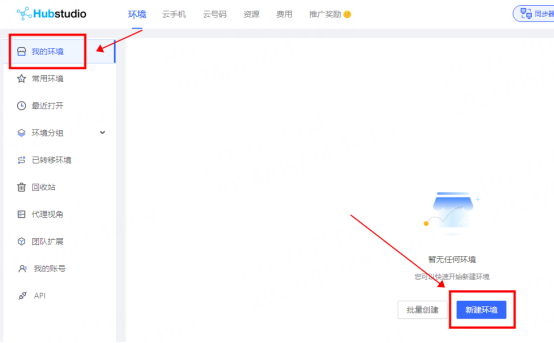
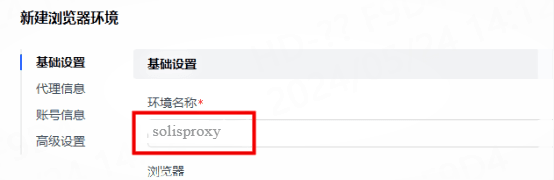
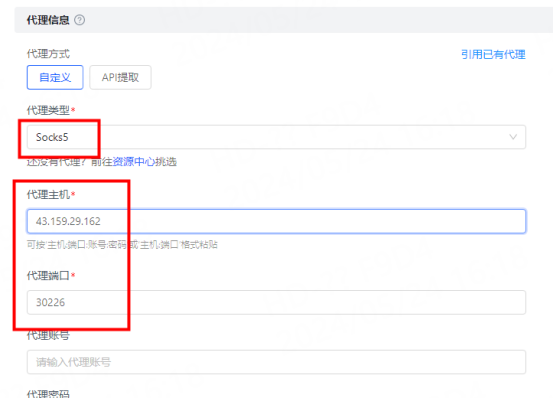


Step 3: Test the connection
Use the built-in proxy check or open an IP lookup site.
If the connection fails, check the connection details and plan status.
Security note: Do not share proxy connection details publicly.